 Pin it
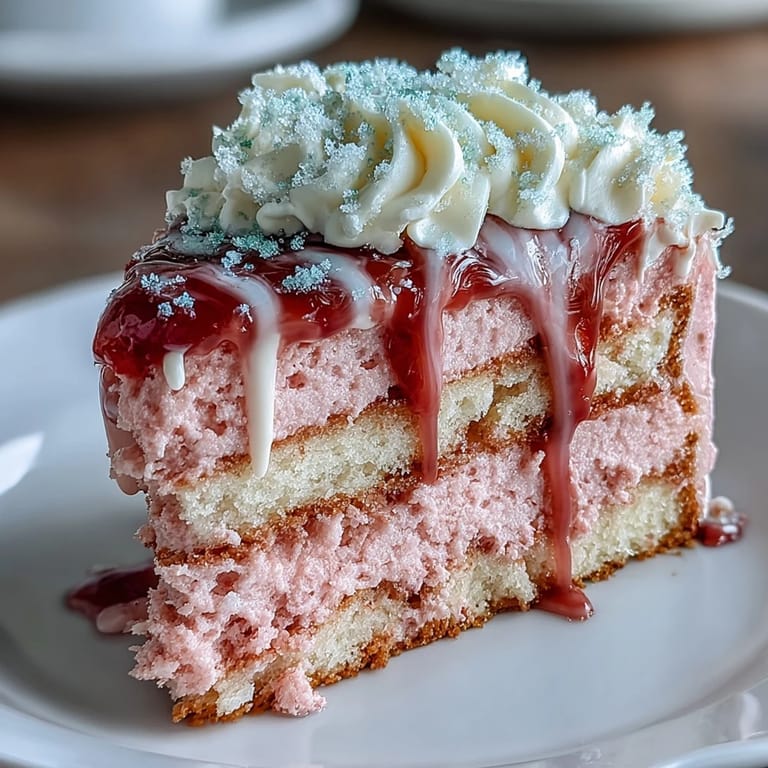
 The first time I played with rosé in a cake, the entire kitchen smelled faintly of summer—light, floral, and just a touch mischievous. As the pale pink batter swirled together, I accidentally flicked a streak across the counter, and I laughed because it looked a little like spilled blush. Sometimes experimenting is worth the risk for a cake that gets everyone talking. There’s something joyful about a dessert that promises a little sparkle even before the first bite. My secret: I fell in love with this cake before it even made it into the oven.
One spring afternoon, I made this cake for a friend’s bridal shower, and we ended up decorating together — frosting smudges on our wrists, sharing laughs while brushing gold onto the drip. We may have gotten as much gold on ourselves as the cake, but those shiny streaks made it feel like we’d created something magical just for her big day.
Ingredients
- All-purpose flour: Gives the cake its structure—a gentle scoop and sweep technique keeps it tender.
- Granulated sugar: Sweetens and softens the crumb, and I always make sure to cream it well with the butter.
- Baking soda & baking powder: Both work together to lift the cake, so always double-check those expiration dates.
- Salt: Essential for bringing out the rosé and chocolate nuances—don’t leave it out.
- Unsweetened cocoa powder: Lends just enough depth; use a good quality brand for the richest color and flavor.
- Unsalted butter: Softened for a silky crumb; I let it sit out while prepping the pans.
- Buttermilk: Adds moisture and a delicate tang; room temperature is best for a smooth batter.
- Rosé wine: Choose one with berry or floral notes for that blush-pink hue and subtle sophistication.
- Large eggs: Help hold everything together, so gentle mixing after each addition keeps the cake airy.
- Vanilla extract: Blooms beautifully with rosé, so go for pure rather than imitation if you can.
- White vinegar: Reacts with the baking soda for a velvety texture—just a touch makes a big difference.
- Pink food coloring gel: Tiny dabs turn the cake blush—sometimes I add a little more for an extra-festive shade.
- Cream cheese: Softened to match the butter, making the frosting ultra smooth and dreamy.
- Powdered sugar: Sifted to avoid lumps in your frosting, so don’t skip this step even if tempted.
- Heavy cream: The secret to a glossy drip—heat it gently so the chocolate melts evenly.
- White chocolate chips: Mild in flavor and bright enough for that gold to really pop.
- Edible gold luster dust & vodka/clear extract: The finishing touch—just whisk with a little vodka and paint when you feel patient.
- Edible garnishes (optional): A few edible flowers or berries add charm, but the cake shines on its own.
Tired of Takeout? 🥡
Get 10 meals you can make faster than delivery arrives. Seriously.
One email. No spam. Unsubscribe anytime.
Instructions
- Set the scene:
- Preheat your oven to 350°F (175°C), line three 8-inch pans with parchment, and let the anticipation build.
- Mix the foundations:
- Sift flour, cocoa powder, baking soda, baking powder, and salt together—watch the powdery clouds rise in the bowl.
- Cream and whip:
- Blend butter and sugar until pale and fluffy; listen for the change in sound as it becomes light as air.
- Build the batter:
- Beat in eggs one at a time, then swirl in vanilla; the mixture will look almost satiny.
- Rosé essence:
- Pour in buttermilk, rosé, and vinegar—let the soft scent rise before gently combining the dry mix in thirds.
- Color with care:
- Add pink food gel gradually, stirring and marveling as the batter turns a perfect shade of blush.
- Bake in style:
- Divide batter between pans, smoothing evenly, and bake 30–35 minutes until a tester comes out clean and the cakes bounce back at your touch.
- Cooling pause:
- Give cakes 10 minutes to cool in their pans, then turn them onto racks, watching them steam gently in the afternoon light.
- Frosting happiness:
- While cakes cool, whip butter and cream cheese until smooth, then add powdered sugar, rosé, vanilla, and salt; keep beating until you have cloud-like peaks.
- Layer and chill:
- Level cake layers if needed, stack with generous frosting, crumb coat, and refrigerate for 30 minutes before adding final swirls.
- Gild the drip:
- Heat white chocolate with cream gently—stir until smooth, let it cool, and carefully drip along the cake’s edge with a squeeze bottle or spoon.
- Gold-luster magic:
- Stir luster dust with vodka and, with a food-grade brush, gently paint the cooled chocolate so it gleams in the light.
- Decorate and delight:
- Finish with edible flowers, more gold leaf, or berries, then chill at least 30 minutes so that first slice cuts sharp and clean.
 Pin it
 That evening at the shower, the bride-to-be brushed the last golden swirl on the cake and teared up—not because of the cake itself, but because we’d made something beautiful together. The cake was the centerpiece, but it was really our laughter and gold-dusted fingertips that everyone remembered.
How to Make a Cake That’s Camera Ready
Natural light is your best friend—icing and crumbs look honest and tempting under a sunny window, not under kitchen fluorescents. If you’re photographing, cut the first slice with a hot knife for crisp edges, and scatter a few petals around for that effortless touch. I love seeing everyone’s phones come out before we’ve even grabbed our dessert plates. Just try not to snap until the drip has set and the gold paint has dried—otherwise, it smudges.
Adapting for Dietary Needs
For friends skipping alcohol, sub in sparkling grape juice—the color and texture stay gorgeous. If you need the cake to be gluten-free, swap flour for a 1:1 gluten-free blend but understand the crumb won’t be quite as soft. Dairy-free cream cheese and butter also work, with a slight flavor twist. Above all else, read your labels—especially white chocolate, which can sneak in soy ingredients.
Decorating Without the Stress
Your frosting doesn’t need to be perfectly smooth—a rustic swirl is just as beautiful, especially layered with gold accents. Don’t panic if your drip isn’t even, it’s more charming that way. If you’re short on time, pipe frosting rosettes on top and skip intricate toppings.
- If your luster dust is clumping, add a drop or two more vodka until it brushes on smoothly.
- Chill your cake after each step—especially before the gold paint—for the neatest finish.
- Let yourself have fun with the decorating, because that’s what everyone will taste first.
 Pin it
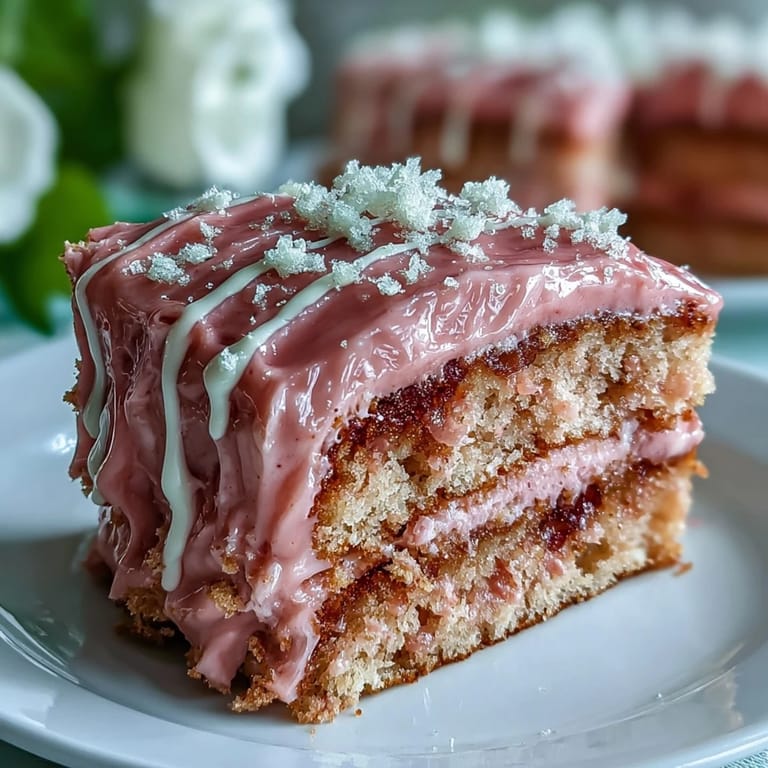
 However you decorate it, this rosé velvet cake brings sparkle to any gathering and guarantees happy, gold-dusted hands. Share a slice with someone you love, then watch the celebration bloom around you.
Recipe FAQs
- → How can I boost the rosé flavor without adding too much liquid?
Brush cooled layers lightly with a few tablespoons of rosé or a reduced rosé syrup; the syrup adds concentrated flavor without altering batter texture. For a non-alcoholic option, use sparkling grape juice reduced into a syrup.
- → What’s the best way to get even cake layers?
Weigh and divide batter for each pan, use three identical 8-inch pans, and tap pans to release air. After baking, cool in pans 10 minutes, then level with a serrated knife or cake leveler once fully cool.
- → How do I achieve a consistent blush-pink color?
Use a concentrated gel food coloring and add it a little at a time to avoid overshooting the shade. Gel provides color without thinning the batter; mix until uniform before dividing into pans.
- → How should I make and apply the gold drip so it holds shape?
Make the drip with melted white chocolate and warm cream, cool to a slightly thick but pourable consistency, then drip from the edge with a spoon or squeeze bottle. Chill the cake to set the drip before painting with gold luster dust mixed with a minimal amount of vodka or clear extract.
- → Can this be made ahead and how should it be stored?
Bake and freeze layers wrapped tightly for up to one month, thaw in the refrigerator before assembly. Assembled and frosted cake will keep refrigerated for 3–4 days; bring to room temperature before serving for best texture.
- → Are there simple swaps for dietary restrictions?
For alcohol-free versions, replace rosé with sparkling grape juice. Use dairy-free butter and cream cheese alternatives and a plant-based cream substitute for the drip to reduce dairy, but expect slight texture and flavor changes.