 Pin it
 There's something magical about corn on the cob—the sweet burst of kernels, the buttery richness, the pure simplicity of summer on a plate. But who says you need a grill or a boiling pot to achieve perfection? This microwave method transforms fresh corn into tender, juicy perfection in just 5 minutes, making it the ultimate quick side dish for busy weeknights or last-minute gatherings. Whether you're cooking for two or need a speedy vegetable to round out dinner, this foolproof technique delivers restaurant-quality corn with minimal effort and maximum flavor.
Pin it The beauty of microwave corn lies in its simplicity. The husk acts as a natural steamer, locking in moisture and flavor while the corn cooks evenly. If you're using husked corn, a damp paper towel creates the same effect. Either way, you'll end up with corn that's just as delicious as boiled or grilled versions—but without the wait or the mess. This American classic gets a modern makeover that fits perfectly into today's fast-paced lifestyle, proving that convenience and quality can absolutely go hand in hand.
Ingredients
Tired of Takeout? 🥡
Get 10 meals you can make faster than delivery arrives. Seriously.
One email. No spam. Unsubscribe anytime.
- 2 ears of fresh corn, in husks (or peeled, see Notes)
- 2 teaspoons butter (optional)
- Salt, to taste
- Freshly ground black pepper, to taste
Instructions
- Step 1: Prepare the corn
- Leave the corn in the husk. If the corn is already husked, wrap each ear in a damp paper towel.
- Step 2: Position in microwave
- Place the corn directly on the microwave turntable.
- Step 3: Microwave
- Microwave on high for 4–5 minutes for 2 ears (3 minutes for 1 ear; add 1–2 minutes for additional ears as needed).
- Step 4: Remove carefully
- Carefully remove the corn from the microwave using oven mitts (it will be hot).
- Step 5: Cool and husk
- Allow to cool for 1–2 minutes. If cooked in the husk, cut off the stem end and squeeze the corn out, leaving the silk behind.
- Step 6: Clean
- Peel away any remaining silk.
- Step 7: Serve
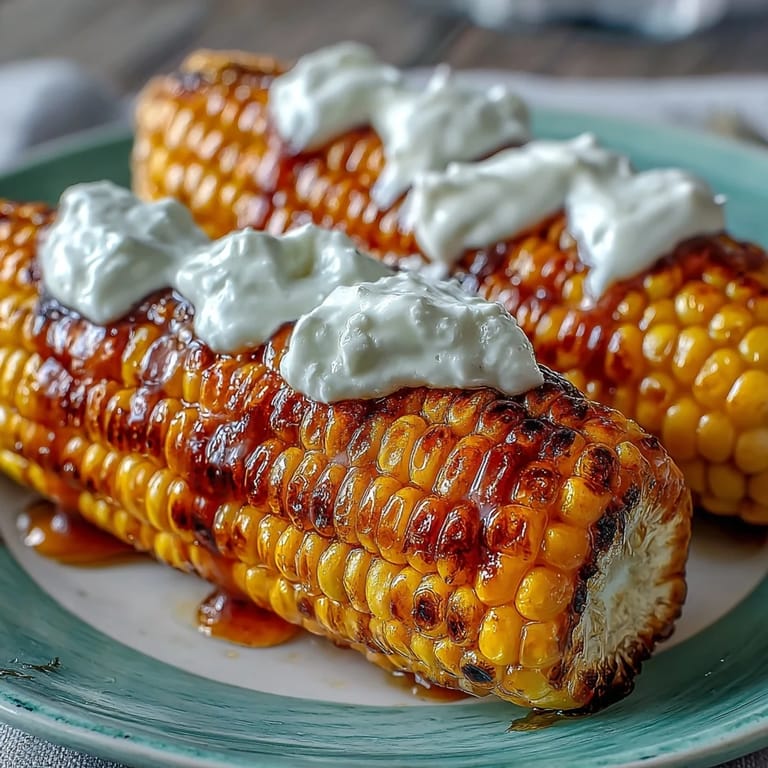
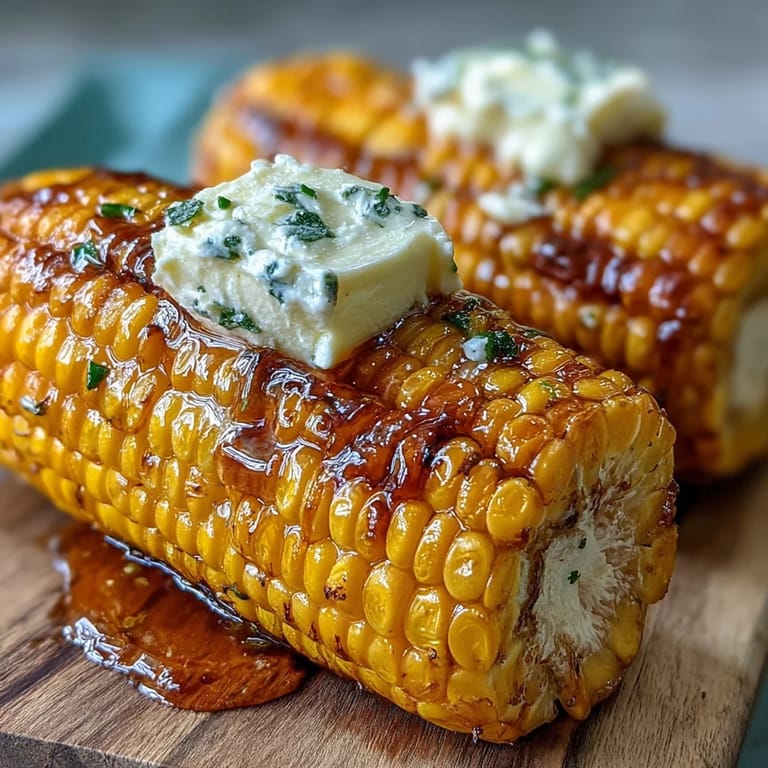
- Serve hot, topped with butter, salt, and pepper as desired.
Zusatztipps für die Zubereitung
If your microwave is less powerful (below 1000W), increase cooking time by 1–2 minutes to ensure the kernels are fully tender. When preparing more than 2 ears, cook them in batches rather than overcrowding the microwave—this ensures even cooking throughout. The cooling period is essential not just for safety, but also to allow the corn to finish steaming in its residual heat. When removing corn from the husk, the squeeze method is wonderfully efficient: simply cut about an inch off the stem end and squeeze from the top—the corn will slide right out, leaving the silk behind in the husk. Use oven mitts throughout, as the corn retains considerable heat.
Varianten und Anpassungen
This recipe is incredibly versatile and welcomes creative flavor additions. For extra depth, add a sprinkle of smoked paprika, chili powder, or grated cheese before serving. Make it vegan by substituting butter with olive oil or a plant-based spread—the corn will be just as delicious. For a Mexican-inspired twist, brush with lime juice and sprinkle with cotija cheese and cilantro. If you prefer a sweeter profile, try a touch of honey butter. Those watching dairy intake can easily skip the butter entirely and season with just salt, pepper, and a squeeze of fresh lemon. The cooking method remains the same regardless of your chosen toppings.
Serviervorschläge
This microwave corn on the cob pairs beautifully with virtually any main dish. Serve it alongside grilled meats, roasted chicken, or barbecue for a classic American meal. It's equally at home next to fish tacos, burgers, or a simple summer salad. For a light lunch, enjoy it with a fresh green salad and crusty bread. The corn also works wonderfully in meal prep—cook several ears at once, cut the kernels off, and use them throughout the week in salads, salsas, or grain bowls. At potlucks and picnics, this quick method means you can prepare fresh corn on-site without any elaborate equipment.
 Pin it
 Mastering microwave corn on the cob opens up a world of weeknight possibilities. This 7-minute method proves that fast food doesn't have to mean processed or unhealthy—sometimes it's just fresh corn, perfectly cooked, ready when you need it. Whether you're feeding a family on a Tuesday night or preparing a quick side for unexpected guests, this technique delivers consistent results every single time. The naturally sweet kernels, the optional buttery richness, and the incredible convenience make this a recipe you'll return to again and again. Embrace the simplicity, enjoy the flavor, and never underestimate the power of perfectly cooked corn on the cob.
Recipe FAQs
- → How do I cook corn on the cob in the microwave?
Leave the corn in its husk or wrap it in a damp paper towel, then microwave on high for 4-5 minutes for two ears. Adjust cooking time based on quantity.
- → Can I add flavors before microwaving corn?
For best results, season the corn after cooking. However, optional toppings like butter, salt, pepper, or spices can be added once the corn is tender.
- → What if my microwave has lower wattage?
If your microwave is below 1000W, increase cooking time by 1-2 minutes to ensure the corn cooks thoroughly.
- → Is it necessary to remove the husk before cooking?
No, keeping the husk on helps steam the corn, preserving moisture and sweetness. If already husked, wrap the corn in a damp paper towel before microwaving.
- → How do I serve corn after microwaving?
After microwaving, allow the corn to cool slightly, then peel away husk or silk if still attached. Add butter, salt, and pepper or other seasonings as desired.
- → Can this method accommodate dietary preferences?
Yes, this approach suits vegetarian and gluten-free diets. For dairy-free options, substitute butter with olive oil or plant-based spreads.